Namaste and welcome to this installment of how to make a wooden surfboard fin. This is another iteration in a long line of attempts at making wooden fins from solid pieces of timber. The previous attempt as seen below wasn't too successful. With the the previous version, the fin lug that holds the screw and fixes the fin to the fin box snapped off.
Now my story (and I usually tell this after my umteenth beer) is that I hit a huge, gnarly, partially submerged bomby, pulling a death defying late takeoff on an insanely huge and hollow reef break which by the way I just made by gripping to the rail of my board with white knuckles and my sphincter snapping. My board flexed almost to the point of breaking, while I powered my way through the bottom turn, got shacked and then spat out like an old piece of chewy. Not likely. At this point, Mrs. Wood Buddha normally rolls her eyes in disgust.
My second theory is that the point at which the lug snapped was a weak point due to the way the grain of the timber runs through the fin and that I never really hit a submerged bomby. BORING!!! Hence the old saying; you should never let the truth get in the way of a good story...or a bad one for that matter.
Anyway, my fin building process is as follows. Not many words which is unusual for me, so I'll let the pictures do the talking.
Enjoy.

The broken fin lug on version 1.0
 |
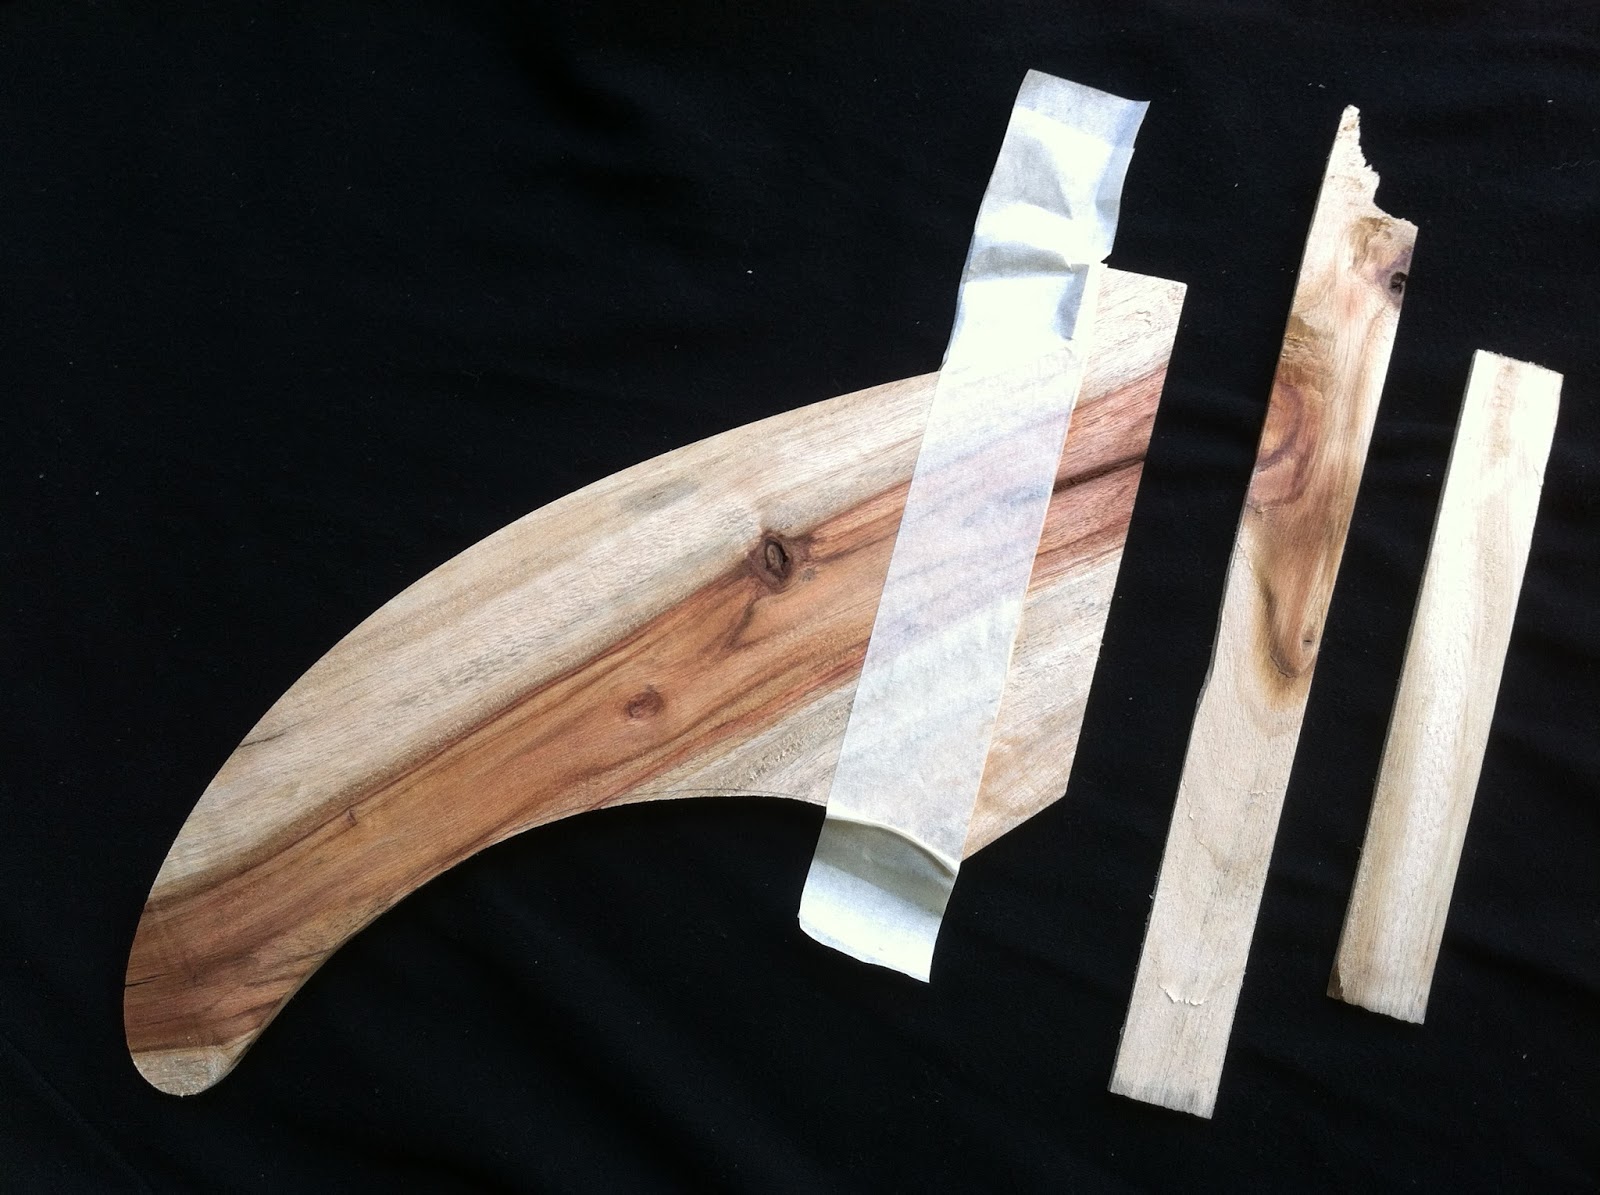
| I used camphor laurel timber for the fins cut from seasoned logs. I rift the timbers on my bandsaw. This ensures that the grain is running perpendicular to the board and minimises warping in the fin. |
 |
| Cutting the fin plan shape on my bandsaw. |


Cutting a mortise into the base lug of the fin.


The base of the fin showing the mortise which is 5 mm thick.


Getting ready to glue the 2 mm strips to either side of the mortise. The 5 mm mortise plus 2 x 2 mm side strips = 9 mm which is the inside width measurement of a fin box.
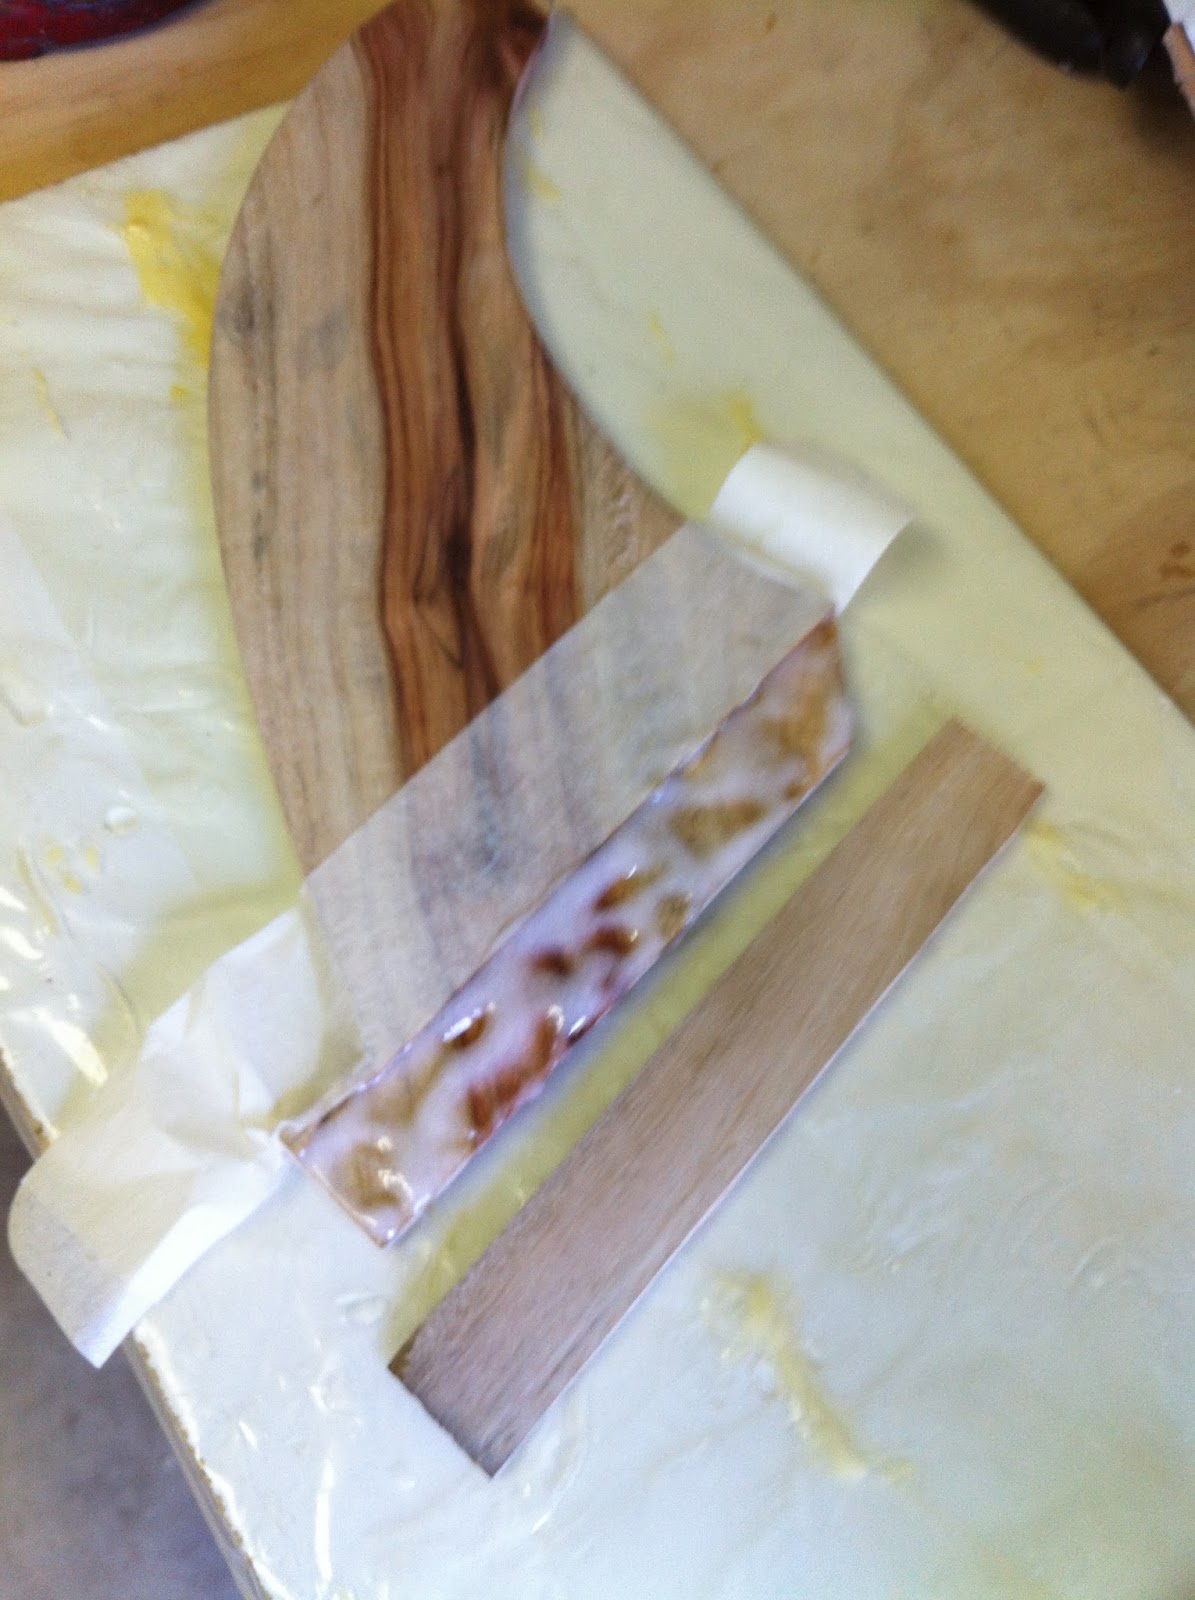
Using thickened epoxy resin to glue the side strips on. The side strips have their grain running from leading edge to trailing edge of the fin which makes for a super strong fin lug and hopefully no more breakages.

All held in place with some spring clamps while the epoxy dries.

This is a paulownia version of the same fin.

Trimming the base of the fin on my bench sander.


All trimmed up and ready for shaping.


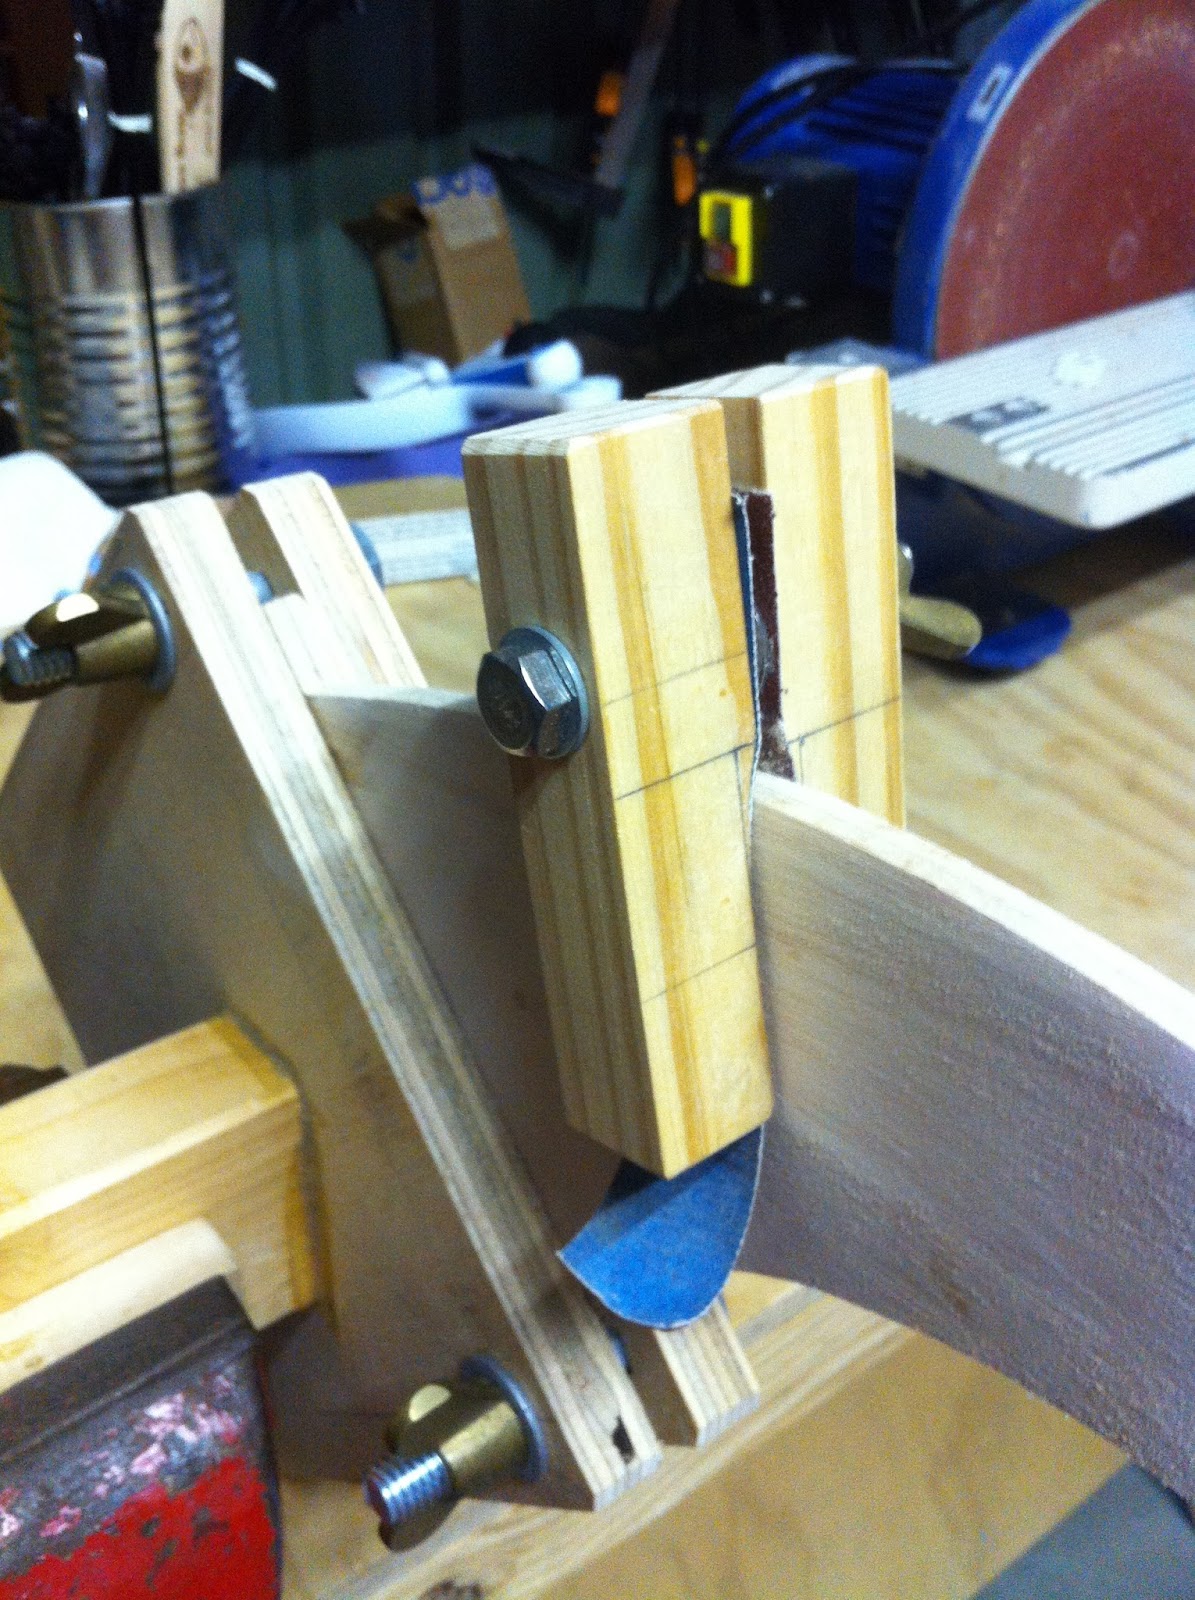
Some custom made shaping tools with 80 grit cloth backed sand paper.


This is the trailing edge shaping tool.
More to come.
Love this so far. Is Part 2 up yet?
ReplyDeleteNo part 2 yet. But some interesting developments and a change of direction. I've started designing fins in CAD and cutting them out of wood using a CNC machine. When I get a chance I'll put up another post.
Deletehello there. very nice job! i would love to see the designs in CAD. would you upload them?
ReplyDelete:)
The fin in this post wasn't designed in CAD so I don't have a CAD file for it.
Deletecould you please share the CAD file of this design, here too? please...
ReplyDeleteSurfer Girls in ACTION!
Thanks for the post...inspiring!
ReplyDeleteGood stuff! I'm also shaping a wooden fin but I do it by the eye. I feel stupid seeing this especially because of each imperfection (and there are many) my fin is way too thin now :). At least I think. How thick is your thickest part? Cheers!
ReplyDeleteHi, Do you have the cnc drawings for the fin up yet?
ReplyDeleteHi, Have you posted the CNC drawings for the fin yet?
ReplyDeleteGreat blog, good ideas carried out
ReplyDeleteWow what a great blog, i really enjoyed reading this, good luck in your work. Surfboard fins
ReplyDelete