
Namaste chisel chokers, and welcome to the second installment of Building a Foam Core Wood Surfboard - A 9'1" Longboard called....wait for it...Iva. As in Iva Big-Woody. I think the hyphen makes it sound a bit posh.
It's been a while since my last post on this particular build and I've been a little preoccupied. It's that time of the year again and that means Mrs. Wood Buddha has drawn up her customary jobs list of things for me to do around the house; fixing up the deck, digging a trench for the new gas line, getting the squeak out of her hinges. As I'm the boss of the house (when she's not around), I am obligated to perform my manly duties otherwise no playing in the Ashram for the Wood Buddha. As They say, whoever They is, "a happy wife is a happy life". That doesn't mean I haven't been able to sneak out to the shed to do a bit of work on my latest board. I just can't help it. The board calls out to me using her special powers of telepathy. The other day, the Mrs. caught me out in the shed working on my board and as she looked at me with that disapproving look that only wives and mothers seem to do so well, she said "you really just can't help yourself, can you?" I explained that the urge for me to work on my wooden surfboard is like having a roaring mongrel in my pants. It just happens and I have very little control over it. She just walked away in disgust and I got an extra hour to work on the board. Bonus!
Anyway, back to the jobs list. The Mrs. has been complaining about my deck. Personally I didn't think there was a problem with it but apparently there is. The size of my deck hasn't been an issue, but I haven't been looking after my deck over the past few years. It's starting to look a bit shabby. The wood isn't as hard as it used to be but I guess that's just because my deck is getting old. I've had quite a few of my neighbours on my deck over the years. You know, at BBQ's and parties and I guess that's why it's so worn out. The other night I woke up to the sound of a possum gnawing on my deck and I thought enough is enough. Time to put some protection on it. So I gave it a good hose down, I sanded it back with 80 grit paper and painted it and now it's as good as new. I even pruned the bushes around it and now my deck looks a whole lot bigger. But it's all an optical illusion. By the way, if you say deck with a Kiwi accent it sounds a little bit rude. But I digress.
In the first part of this post, I had cleaned up the foam blank and squared off the sides, laminated the inner rail bands, and laminated the top and bottom skins. In this part, I'll complete the outer rail laminations, shaping, sanding, fin boxes, leash plug and final coat of epoxy. I decided to go with an epoxy finish to add a bit of strength and hardness to the paulownia skins.

The surfboard ready for the first two rail bands. There will be 5 x 4 mm rail bands on each side in total. The sides have been cleaned up with a hand plane and sanding block and I've checked the outline against the original template to make sure both sides are symmetrical. I decided to do a basket weave pattern for the rail bands gluing up two rails at a time on each side. I really like the look of this pattern where the rail bands join at the nose and tail of the surfboard.

Marking the rail bands onto the 4 mm paulownia panels. I use the template I made previously out of some old vinyl sign material to scribe the rail band pattern onto the paulownia sheet.

Marking the rail bands onto the 4 mm paulownia panels. I use the template I made previously out of some old vinyl sign material to scribe the rail band pattern onto the paulownia sheet.

Cutting the rail bands on my bandsaw. You can also use a jigsaw with a fine blade. I also plane the edges of my rails with a small palm plane to minimise splitting when I bend the rails around the board.

Planing the edges of the rail bands before steaming.

Planing the edges of the rail bands before steaming.

I use masking tape around the edge of the top and bottom skins to protect the timber from glue spills. Ready for rails 1 and 2.

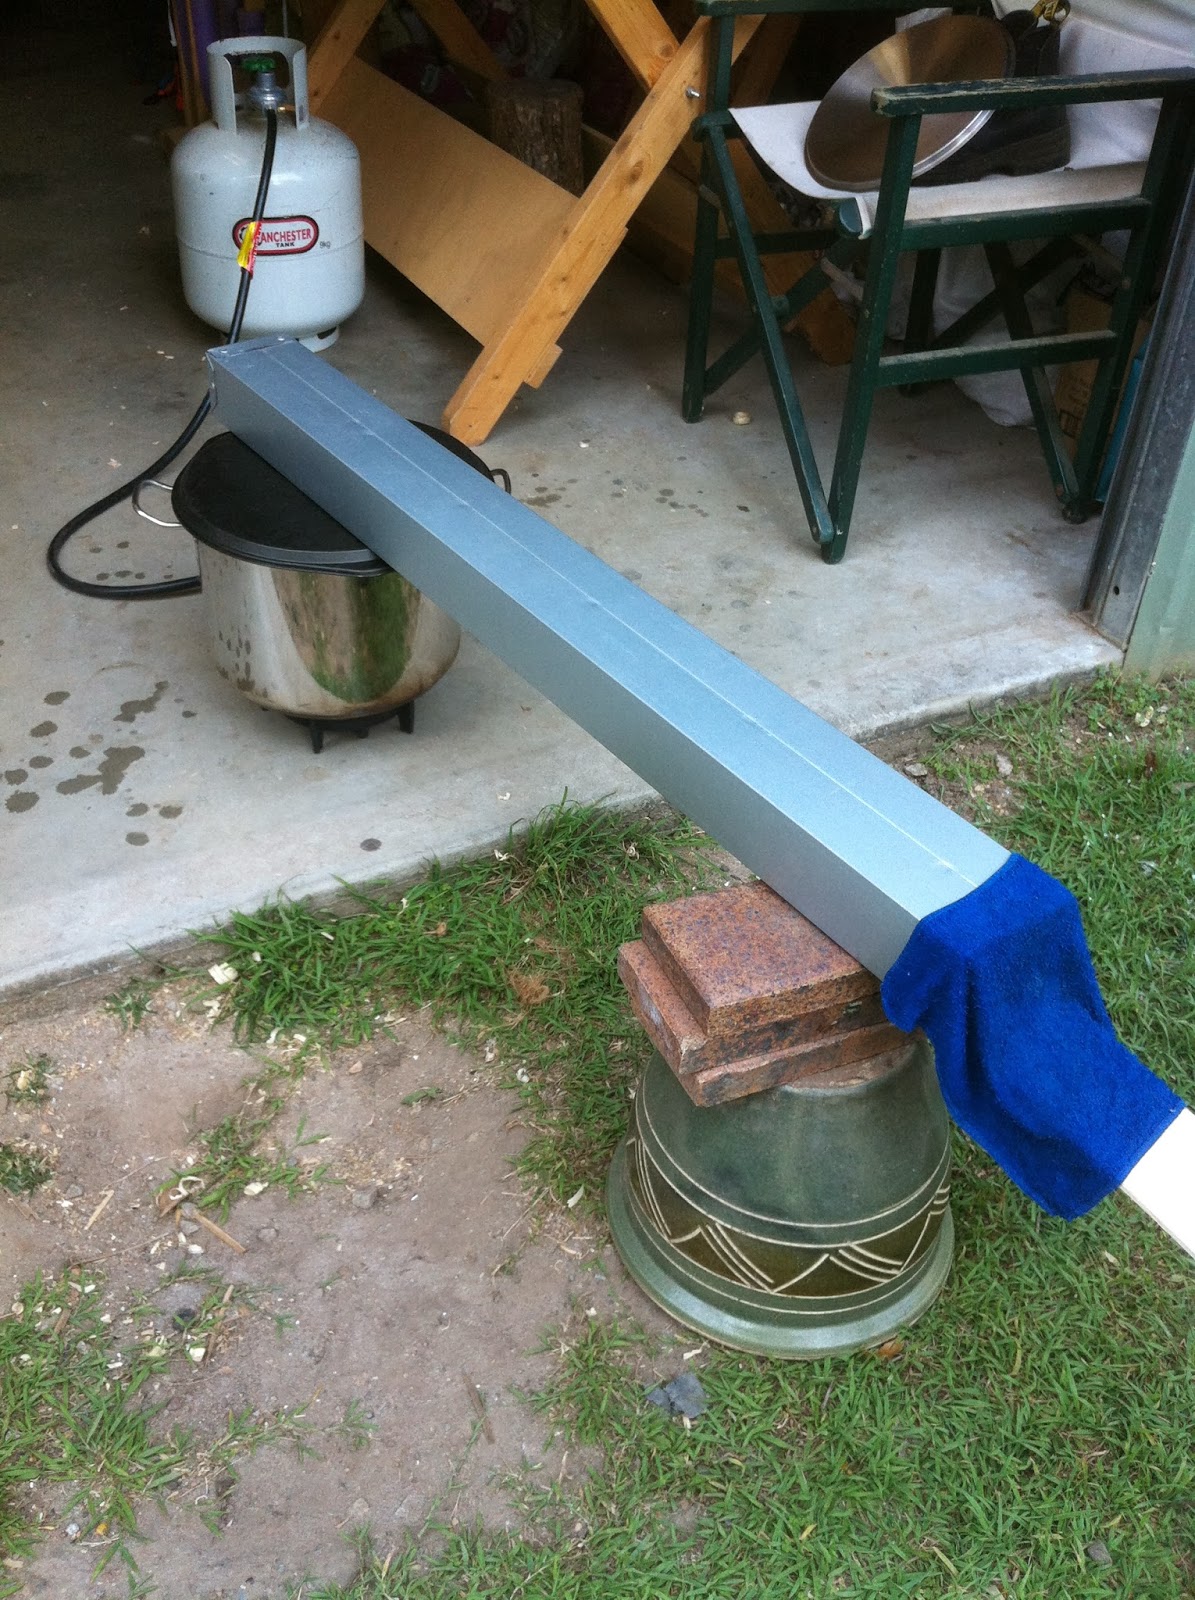
Steaming the rails using my custom built steam box. A one metre section of galvanised rectangular down pipe (75 mm x 100 mm) riveted to the bottom of a pizza tray. The pizza tray and down pipe have two 60 mm holes cut into them to allow the steam through. The pizza tray sits over a pot of boiling water. It works surprisingly well. The 4 mm rails bands are very soft and flexible after about 10 - 15 minutes of steaming.
 2 x 60 mm holes drilled in the pizza tray and down pipe.
 A couple close ups of the wet, hot, steaming box. Hey you lot! Get your mind out of the gutter!


After steaming the rails for 10 to 15 minutes, I tape them to the sides of the board (two at a time) for a couple of hours. If you are using polyurethane glue like I am, a little bit of moisture in the the rails will help with the curing process. If you are using an epoxy or other glue you might want to leave the rails bands until they are completely dry before gluing them to the surfboard.

I remove the masking tape and apply FMP 200 polyurethane glue to the inside faces of the rails with a squeegee. I then tape the rails to the edge of the board and allow 2 - 3 hours for the glue to dry. The advantage of using this method is that you don't need any special clamps however it does use a lot of masking tape which ends up finding its way to landfill.

The surfboard nose, glued and taped.

A shot of the nose. A fair bit of tape is needed to hold the rails in place here.

The rails at the tail all glued up.

I lay the board hull (bottom) side down to avoid any glue drips onto the timber. Gluing two rails at the same time can also be a bit fiddly.

Another shot showing the rails gluing.

After the glue has dried, I remove the tape and trim down the rail bands until they protrude 5 - 10 mm above the top and bottom skins. You don't have to do this but I find it easier to trim the rails as I go.

Trimming the nose with a dovetail saw and sanding block. Ready for rails 3 and 4 on the other side of the surfboard.


I haven't been comfortable with the amount of masking tape I have been using to hold the rail bands in position while the glue dries so I decided to experiment with a jig that uses ratchet straps as clamps. The jig bolts to the top of my shaping stands. It's at a good height that allows me to get to the underside of the surfboard.

A photo showing the other side of the jig.

Steaming rails 3 and 4 for the right hand side of the board.

Fixing rails bands 3 and 4 in place (after steaming) using ratchet clamps and my custom made rail jig. I usually leave the rails for about an hour or two to dry. This is an alternative method to using masking tape that I've been playing around with lately. It works well. A drop sheet on top protects the timber from dings and scratches from the ratchet clamps.

I initially started using a custom made jig with the nose outline cut into it and lined with foam to hold the rails in position at the board nose. The curve has to be accurate to get an even pressure on the rail at the nose. After a couple of hours, I remove the straps, apply polyurethane glue to the side of the surfboard and the inside faces of the rail bands. I position them on the side of the board, set up the ratchet straps and and gently tighten them making sure the rails are positioned correctly and firmly against the side of the board.

The timber jig holding the rails in position around the nose of the board.

Ratchet straps holding the rails in place at the centre of the surfboard.

A view of the tail.

Another shot of the board in the jig.

A photo of the board tail. I use masking tape to protect the straps from glue spills. Dried glue on the strap makes it difficult to feed into the ratchet mechanism.

The view from the tail.

A closeup of the nose jig.

A small piece of sandpaper folded over rough side out helps stop the straps from slipping near the tail of the board.


The rails at the nose trimmed back roughly with a dovetail saw.

The same for the rail at the tail.

Trimming the top and bottom edges of the rails with a palm plane until they protrude 5 - 10 mm above the top and bottom skins.

I've been going through a fair bit of Heineken's new marine glue. Doesn't work very well on the board but it tastes great. Good tip Moasey!

I've been going through a fair bit of Heineken's new marine glue. Doesn't work very well on the board but it tastes great. Good tip Moasey!

The nose ready for some fine rhinoplasty using a dovetail saw and a sanding block.
Before...
Before...

...and after.

The tail trimmed back and sanded, ready for the first tail piece.

The first tail piece (2 x 4 mm strips) glued and taped in place.

After 2 - 3 hours the tape is removed and the tail is trimmed using a dovetail saw and sanding block.

The tail neatly trimmed. The board is now ready for the next set of rails.

Ready for rail numbers 5 and 6.

Steaming the rail bands for about 10 - 15 minutes makes them bend easily around the nose of the board.

The rail bands in the jig for an hour or two, so they bend to the contour of the surfboard nose.

Polyurethane glue has been applied and the rails are strapped in the jig for 2 - 3 hours until the glue has dried.

The tail strapped in.

Lots of straps ensure the rails are positioned firmly against the surfboard while the glue dries.

A snug fitting rail strapped against the surfboard nose. I used plywood blocks with high density foam glued to them this time. It seems to work better that the curved jig and is a little more versatile. That is I can position them wherever I need to.

The surfboard tail. The polyurethane glue foams up and expands filling every nook and granny.

I use 7 mm marine ply blocks (100 mm x 100 mm) with high density foam glued to one side. This ensures a firm pressure is applied to the rail without denting the timber. Paulownia is very soft and dents easily.

A larger section of marine ply (100 mm x 100 mm x 1 metre) with high density foam glued to one side. I use this to hold the rail to the middle section of the wooden surfboard.

Another photo of the jig near the surfboard nose.

...and another. I think you get the idea. Gluing the rail bands can be a bit tedious. Doing two at a time does shorten the process. I've been thinking about this and I've been about an alternative method that saves some time. Maybe for a future surfboard.
 I was bragging recently about how steamed paulownia doesn't split when I bend it around the nose of a board. Sure enough, when I went to work on my board after making that comment, I managed to split a rail. Luckily it wasn't a big split and I managed to stop it from spreading all the way around the nose of the board. That'll teach me to keep my trap shut.
 Another shot showing the split. One thing that I've learnt from building wood surfboards is that no matter how careful I am things do go wrong. I think the skill of the craftsman is in how to correct any stuff ups with style.
 Ratchet straps removed and the rails ready for planing
 The tail before trimming.
 The tail before trimming - gecko view. I've got a lot of geckos living in my ashram. The little buggers crap all over my board if I don't cover it with a drop sheet.
 The culprit.
 Marking out the nose for trimming.
 Planing the tops and bottoms of the rails.
 The nose marked and cut with a dovetail saw.

Finished with a sanding block and 80 grit paper ready for rails 7 and 8.
 Trimming the tail with a dovetail saw.
 Steaming rails 7 and 8.
 The board with rail bands in the jig for an hour or two.
 Bending the rails to the contour of the surfboard nose.
 Polyurethane glue has been applied and the rails are strapped in the jig for 2 - 3 hours until the glue has dried.
 The rails held firmly in place around the surfboard nose.
 The polyurethane glue dry, and ready for planing.
 Using my little palm plane. I picked this one up on ebay from the USA for about $25 including postage. I use it to do all my rough work.
 The board nose trimmed and sanded ready for rail band 9. Rails 9 and 10 will be single rail bands on either side of the surfboard.
 The tails neatly trimmed and sanded and ready for the next tail piece (2 x 4 mm paulownia strip).
 The tail piece glued and taped in position.
 After 2 - 3 hours, the tape is removed and the tail is ready for a trim and clean up with 80 grit sand paper.
 Steaming rail number 9.
 Clamped in position after steaming.
 The nose with glue drying.
 The rail at the tail.
 Lots of ratchet straps ensure everything is where it should be while the glue dries.
 Planing the top and bottom of the rail. You can start to see the basket weave coming together at the tail.

I ended up snapping one of the rail bands while bending it around the nose. I think it needed some more time in the steam box. Some polyurethane glue and clamping and it was all fixed.
 Clamping the broken rail band while the glue is drying.

On the home straight. Ready for rail number 10.

Steaming number 10.
 In the jig after steaming.
 Applying glue to the inside face of the rail.
 The view from underneath the board.
 Lots of straps especially at the nose. This rail was a stubborn little piggy and I didn't want it breaking for the second time.
 Just 2 -3 hours and then the fun bit starts. Shaping.
 The tail - ready for a trim.
 Out of the jig and ready for the spoke shave.
The next stage involves planing the top and bottom of the rails to the top (deck) and bottom (hull) contours of the board. I take my time with this part of the process and make sure my spoke shave and hand planes are nice and sharp.
 Planing back the top of the rails to the top contour of the surfboard.
 Planing the top of the rails near the nose.
 A sharp spoke shave makes light work of the rails.
 The tail is starting to look the goods. The basket weave pattern is really starting to stand out. There is still one more tail piece to glue on.
 The top of the rail planed and sanded back to the contour of the deck.
 My adjustable Kunz spoke shave is a pleasure to use. German precision at its best.
 Another view looking towards the tail.
 The nose planed and ready for some light sanding.

A close up showing the top of the rail planed down the the deck contour of the surfboard. You can also see the squared rail edge.
 Gluing on the last tail piece.
 A view of the tail block from the back.
 Gecko view of the tail.
 The basket weave pattern underneath the nose.

Shaping tools. A profile guide, spoke shave, palm plane, foam sanding block and 80 grit sand paper.

Starting the shaping process with a spoke shave.
 Shaping the rails towards the tail.
 A close up of the tail.
 I wasn't overly happy with the rail lap joints at the nose and decided to go with a nose block. Some severe rhinoplasty with a tenon saw.
 Cleaning up the cuts with 80 grit sand paper and a sanding block.
 Gecko view.
 A closeup showing the rail construction.
 Gluing up the nose block. Paulownia with cedar feature strips.
 Gluing the nose block to the board using polyurethane glue.
 Lots of tape and a ratchet strap.
 Cutting the nose outline with a jigsaw.
 Some sanding with 80 grit sand paper and the nose block is starting to take shape. I work may way through finer grades of sand paper. 120, 180 and 240 grit.
 A closeup of the nose block.
 The cedar feature strips really compliment the paulownia.
 Where the rail meets the nose block. A happy union.
 The board out in the sunshine soaking up some rays and ready for a coat of resin. I finish sanded it with 240 grit sand paper.

Ready to apply a resin coat to the top. My weapons of choice. I use about 150 grams of resin. I squeegee it on first then roll the shit out of it (evenly) with a small roller then finish with a foam brush.
 The deck after a coat of epoxy resin. The colour and the grain of the timber really jumps out.
 The top of the nose.
 The resin really brings out the detail in the joinery at the tail.
 After 24 hours it's time to do the bottom. I've lightly sanded the bottom of the rails with 240 grit sand paper. I use about 150 grams of resin on the bottom as well. Squeegee, roll and finish with a foam brush.
 Looking nice. After 2 -3 days I give the whole board a light wet sand with 240 grit wet and dry sand paper.
 Routing the slot for centre fin box.
 Dry fitting the fin box.
 A nice neat clean slot for the fin box.

Drilling the hole for the leash plug with a 30 mm Forstener bit and jig. The jig ensures a nice clean cut and aligns the drill bit accurately.
 Blue tack under the jig ensures it doesn't move around and also protects the timber from scratches.

 Dry fitting the leash plug.
 Drilling the holes for the side fin plugs.
 The jig ensures neat cuts.
 Ready for the fin boxes and plugs.
 The leash plug hole taped and ready for gluing.

The leash plug with epoxy curing.
 Gluing in the centre fin box. I use epoxy resin thickened with micro balloons which are a rich chocolate brown colour. I use a square to make sure the fin is perpendicular to the bottom of the board and then tape it in place while the epoxy cures. I also make sure that this part of the board is level to prevent the epoxy running.

The centre fin box after the epoxy resin has cured. Some small bubble holes toward the back can be filled after sanding.
 Gluing the side fins. I copied the cant from my long board and used a sliding bevel to measure and check the cant angle of the side fins.
 Masking tape holds the fin in place while the epoxy resin cures.
 A second application of epoxy and micro balloons to fill small holes around the centre fin box.
 Filling small holes around the side fin plugs with epoxy and micro balloons.
 After sanding with a 240 grit disk and orbital sander.
 Ready for the epoxy finish coat on the deck. I use about 90 grams of resin measured by weight using a set of diet scales.
 I roll on the epoxy and then finish with a foam brush.

 The nose after the hot coat.
 Finished and ready for a test ride.


Finished with a sanding block and 80 grit paper ready for rails 7 and 8.


I ended up snapping one of the rail bands while bending it around the nose. I think it needed some more time in the steam box. Some polyurethane glue and clamping and it was all fixed.


On the home straight. Ready for rail number 10.
Steaming number 10.


The next stage involves planing the top and bottom of the rails to the top (deck) and bottom (hull) contours of the board. I take my time with this part of the process and make sure my spoke shave and hand planes are nice and sharp.


A close up showing the top of the rail planed down the the deck contour of the surfboard. You can also see the squared rail edge.


Shaping tools. A profile guide, spoke shave, palm plane, foam sanding block and 80 grit sand paper.

Starting the shaping process with a spoke shave.


Ready to apply a resin coat to the top. My weapons of choice. I use about 150 grams of resin. I squeegee it on first then roll the shit out of it (evenly) with a small roller then finish with a foam brush.


Drilling the hole for the leash plug with a 30 mm Forstener bit and jig. The jig ensures a nice clean cut and aligns the drill bit accurately.


The centre fin box after the epoxy resin has cured. Some small bubble holes toward the back can be filled after sanding.


The board weighs in at 8.5 kg (19 lbs) compared to the original PU board which was 7.6 kg (17 lbs).
I also gave the board a final wet sand with P600 wet and dry sand paper.
Special thanks to Grant Newby for sharing his foam core building method, Geoff Moase from Dovetail Surfboards for his superior quality paulownia and Rob & Carl from Southcoast Foam for cutting the foam blank and putting up with a millions of questions and emails from me.
And a very big special thanks to my very patient and understanding wife Alex.
Each wooden surfboard that I make is a learning experience. So I've included some of the takeouts for me below.
1. Building surfboards and young children do not mix well. Although I hope that one day wooden surfboard building is an activity that I can share with my two boys (4 and 6), now is not the time to have them running around in the ashram and having access to my tools particularly those that have the power to maim or kill. Let me assure you that being held hostage by a 4 year old with a nail gun is a life changing experience.
2. Using a rocker table to hold the profile of the board true while vacuum bagging and gluing the top and bottom skins to foam is something I will do on my next board. I did use wood blocks under the nose and tail but support at other points under the board would have been better.
3. Sanding the top and bottom of the foam core helps to reduce the amount of glue used. It's probably not so critical on a longboard but for a surfboard where weight is a consideration, this would help to reduce the amount of glue and glue weight.
4. Things do and will go wrong. Adapt, modify and overcome.
5. Take your time and don't rush.
6. The steam box and rail jig are two tools that worked well in this build. I will continue to use them on future boards.
7. 50% fine paulownia dust and 50% wheat flour mixed with polyurethane glue to make a stiff putty works well as a filler on small gaps and cracks. It provides a nice colour match with the pauownia timber.
8. It's much easier to sand the top and bottom panels on a flat surface before they get glued to the foam core and sand them to a final grade of 240 grit. A random orbit sander works well or if you have access to a drum sander that's even better. Ideally you can buy the panels already made and sanded from Geoff Moase at www.paulowniatimbersales.com.au.
Ride Report (December 2013)
I just got back from a week at Caloundra on the Sunshine Coast. Had about 6 sessions on the board. Most days were waist high onshore wind swell and bumpy. Managed to get a clean day with waves at chest height after 2 days of strong on shore south easterly winds.
Overall I am very happy with the way the board performs. It paddles easily, catches waves easily which I think is helped by the kick in the tail. It turns well although I would like to play around with the placement of the centre fin a bit more to see how the fin position changes the way the board turns. The extra board weight is a real bonus with lumpy waves and the board has a nice momentum and drive.
Congratulations WB on possibly the most comprehensive and detailed post I have ever seen, ('cept maybe for Touchwood's Pot Belly). I don't even remember to take photos.
ReplyDeleteToo much detail? I think it's my obsessive compulsive tendencies coming through. BTW, Touchwood does a mean blog.
ReplyDeletePlanning a similar project to this for my board after next so lot of tips here, many thanks!
ReplyDeleteThanks Andrew. If you have any questions, just drop me an email.
ReplyDeleteMate it took me longer to read the post than build the board. Great effort and thanks for sharing.
ReplyDeleteThats nothing short of awesome! Nice job - been meaning to drop around and check it all out.
ReplyDeleteAwww, shame about the nose looked great bofore.
ReplyDeleteHow did you make the profile guide for the rails once the wood was in place and needed to be sanded.
ReplyDeleteI used some plastic vinyl sign material. I taped sections together in a long strip about 150 mm wide and layed the strip along the rail. I then ran a marker pen along the board marking the profile on the vinyl strip and then cut it. I used the strip to mark my rails out of a paulownia panel. The other way is to run the BRD file through HBTM and print the profile on sheets of paper.
DeleteHow did you make the profile guide? Is there a template?
ReplyDeleteSee my reply above.
DeleteHow well does this hold up with the brush on resin as opposed to fiberglass?
ReplyDeleteThe brushed resin finish holds up fine. No need to fibreglass a foam core board.
DeleteHow well does this hold up in the surf with the resin, as opposed to a fiberglassed finish?
ReplyDeleteHave you ever done/what are your thoughts on using thin ply for the rails and sanding to shape?
ReplyDeleteSuch a great read. You are very meticulous and detailed. Just what us wood board builders need! I am working on a cedar skinned on a “recycled “ PU blank right now. I’m very close to the glassing stage. Wondering why you didn’t use a fiberglass cloth? I guess it does not need it? It got me rethinking the glass process I’m getting ready to do. You humor is hilarious and your writing is spot on.
ReplyDeleteAnd what a great board! I love how you changed the nose at the last minute. Although, I did like the original too! But I get it.
ReplyDelete