
Namaste Wood Peckers,
I received an email in my inbox from Duncan, a woodwork teacher from Canada. He's just finished his cold water timber fish. Great effort and beautiful board to boot. Duncan used the design from my blog post:
http://thewoodbuddha.blogspot.com.au/2013/10/building-hollow-wooden-surfboard-62.html
Here's his story and also his Instagram page for more photos.
https://www.instagram.com/duncan.walters/
So ya in total the process only took about 15 working days, but spread over a couple months, and with a few bumps in the road. The first step was the rocker board that came along real well after my buddy was able to figure out how to bring your DWG file into something that was usable in his CAD program. The file changed a bit when we did that so we had to tweak the drawing a bit in order to scale it. Once that was sorted we cut it out on his CNC with some nice 3/4" fir plywood.


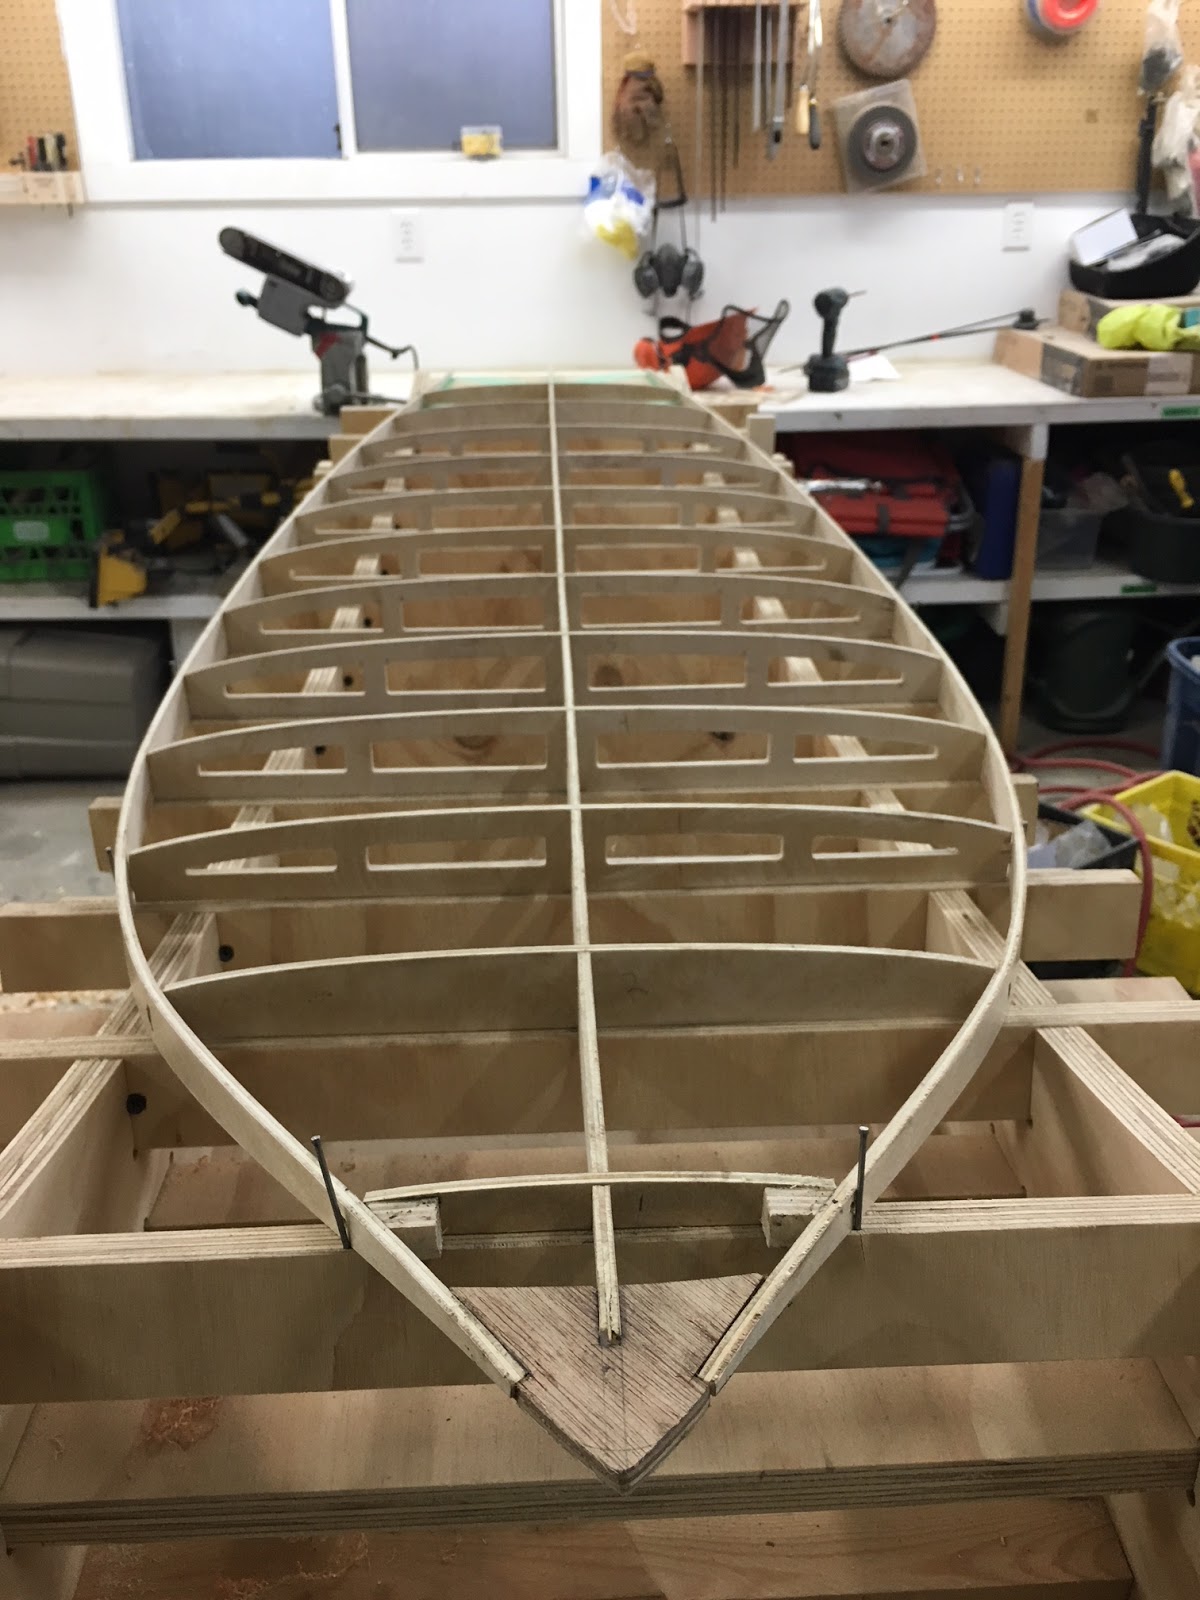
From there it took me forever to lock my buddy down to cut out the frame of the board, and while I was waiting and doing some other woodworking I cut off part of my finger! Lost the end 1/3rd of my left index so I had to pump the brakes a bit. 2 weeks after my finger incident we got the frame cut out, the first time with 1/4" marine grade mahogany because my friend had some scrap. Unfortunately when we adjusted the size of the notches on the main stringer to the width of the material, we also inadvertently resized the entire drawing, ending up with a board that was 4" too long and that no longer fit the rocker board. The next frame we cut out we used good-one-size birch. Not ideal if water ever gets in the board due to its lack of rot resistance, but it seemed stable and flexible enough to due the job. In the end it was great to work with, even better than the mahogany because the latter of the two seemed too brittle to bend. Something lighter would've been nice if you were counting grams, but at this point the frame could still be picked up with a finger and thumb.
Getting the frame together was actually harder than expected. Without knowing what cross section was which, there are a surprising amount of combinations that seem like they could work (especially when you've had a few beers, then it's like pandoras box!). Not sure if there were markings on your CAD drawings, but we couldn't seem to find them.
Now that the rocker board and frame were done I thought about how i wanted to put the board together. I had quite a complicated design in mind so I figured it would be easiest to just make the deck and hull panels on a flat surface, trim them to the rough outline of the board, and then clamp those onto frame one at a time. I put a bead and cove profile onto the cedar strips to help facilitate the bending that would happen during the clamping. The panels came together really well but the clamping was definitely challenging - I knew it was coming but because of my specific design (the diagonal pieces specifically) it was a challenge to get the board to bend uniformly. Ultimately I just had to use every clamp, roll of tape, ratchet strap, and the odd screw that I had in my reasonably limited shop. But all things considered it came together well, with the exception of 2 spots that I had to sneak some water and gorilla glue into and reclamp.

Once the panels were glued to the frame and cut it almost flush to the vertical sidewalls (rails) and then sanded it flush with my orbital sander. Then came the job of laminating strips onto this face in order to make wood for the rails. I could've just used solid wood, but i wanted to keep the weight to a minimum so I laminated strips so that the middle of the rail would be hollow. Again this process took a hell of a lot of clamping, mostly because I was a bit short on wood and couldn't cut a proper rocker into the strips that was a forcing into some complex curves.


Hand shaping the rails was definitely one of my favourite experiences, and i found most of the info on the green light surf supply website. I drew on some suggested rail bands and had to adjust them a fair bit to what seemed right because rail bands are typically drawn onto a flat rockered blank, but because the board already had a curved top it took a bit of guessing there. Either way it seemed to come together well and I've got a decent set of pictures of that process on my instagram page.


For the fins I used FCS plugs and was really happy with the system. Not super cheap because you really need to buy the router bit and jig. Well worth the money though because it seems like an obvious entry point for moisture.


After that it was just a bit of filling with some epoxy/sawdust, and then a good amount of sanding to get the final shape. I used a fairing board with really coarse grit to start and then moved onto my random orbital sander. Had i owned a variable speed sander i wouldve used that instead.

The fibre glassing is always nerve wracking, but had started getting the hang of it after my last boat. Always found it worth while watching tons of videos of people doing it and then seeing what style will work for you. I used 4 oz E cloth on each side and then at this point cut the hole for my vented leash plug (also FCS). after installing the plug there needed to be a way of keeping the gel coat from running down into the little vent holes at the bottom of the leash plug. For this I cut a piece of wood to size and then put some mold release wax on it to prevent the epoxy from sticking to it. Im positive there is a better way to do this haha. Then a good thick gel coat to finish things off. For the varnish I worked up from 80-120-180 grit and then did 3 coats of varnish on each side in order to make sure that the epoxy (west systems 105/207) had enough UV protection.

Thanks again for the design!
No comments:
Post a Comment